
Let’s talk about Plugins, amazing tools that help us in tasks that otherwise would be hard or tedious to do manually.
You probably heard about plugins, indeed, you probably use one! I mean, there are a lot of plugins out there that enhance our experience as developers or even allow us to do things that otherwise we couldn’t. Just look at me, I have quite a few plugins and I even have more disabled plugins.

But what truly are those plugins?
They are normal roblox scripts that can be exported for free as if they were models, the cool thing about them is that they can be installed in your studio and their code will run in-studio during edit mode, they can be quite useful, so let’s see how to create your own plugin.
1. Setting up a plugin
First thing you have to know is that you can export a script as a plugin but also as a folder containing multiple scripts or other type of instances. Some plugins are simple and only need one script, but in this tutorial we’ll be going for the folder alternative.
-
Create a folder that will contain the plugin content.
-
Insert the main script we’ll be using for our plugin.
Now we can start scripting our plugin.
2. Scripting the plugin
You can write anything you want in plugin scripts, they work like normal scripts, you have access to roblox services and apis and you also have access to other exclusive services like Studio Service.Since this is a plugin there are some extra cool things we can also do, like creating plugin buttons or widgets, saving values or detecting the studio mouse. We’ll be learning how to do it.
1. Plugin Buttons
Let’s try to script plugin buttons like the ones you saw at the beginning of the post, we’ll also need a toolbar to put them in before creating them, take as an example Reclass toolbar.
local toolbar = plugin:CreateToolbar("Plugin Name")

--: Replace "Plugin Name" with the name of your plugin or similar.

local button0 = toolbar:CreateButton(
	"Unique_ID_0",
	"Button_Tooltip",
	"rbxassetid://5806779841",
	"Button_Name"
)

local button1 = toolbar:CreateButton(
	"Unique_ID_1",
	"Button_Tooltip",
	"rbxassetid://5806779841",
	"Button_Name"
)
Voilà, we now have the toolbar and the buttons, easy. As you see the buttons have 4 different properties, they’re pretty self-explanatory.
- Button id (required)
- Button tooltip (optional)
- Button icon (optional)
- Button name (optional)
But what’s the point of having buttons that do nothing? Let’s make it so the buttons do something when pressing them, we’ll use .Click for this.
local toolbar = plugin:CreateToolbar("Plugin Name")

--: Replace "Plugin Name" with the name of your plugin or similar.

local button0 = toolbar:CreateButton(
	"Unique_ID_0",
	"Button_Tooltip",
	"rbxassetid://5806779841",
	"Button_Name"
)

local button1 = toolbar:CreateButton(
	"Unique_ID_1",
	"Button_Tooltip",
	"rbxassetid://5806779841",
	"Button_Name"
)

local function onButton0Click()

end

local function onButton1Click()

end

button0.Click:Connect(onButton0Click)
button1.Click:Connect(onButton1Click)
As you can see we can connect our buttons to a function when pressed by using .Click. Now you can put whatever you want inside those functions and they will fire when pressing the buttons, but in this tutorial we’re gonna take a look at the Studio Widgets.
2. Plugin Widgets
The studio is full of widgets by default, the toolbox, the explorer, the output and all those windows you see are studio widgets! And we can create our own by using plugins, just like this:
local widgetInfo = DockWidgetPluginGuiInfo.new(
	Enum.InitialDockState.Right,  --: This is the initial dockstate of the widget
	false,  --: Initial state, enabled or not
	false,  --: Can override previous state?
	500,    --: Default width
	500,    --: Default height
	100,    --: Minimum width
	100     --: Minimum height
)

--: This will be the info of the widget we're going to create

local widget0 = plugin:CreateDockWidgetPluginGui("widget0", widgetInfo)

widget0.Title = "Optional Name for the Widget"
Done! We’ve created a plugin widget but if you read carefully it is disabled by default, so now we can use our buttons to enable or disable the widget by pressing them, just like this.
local toolbar = plugin:CreateToolbar("Plugin Name")

--: Replace "Plugin Name" with the name of your plugin or similar.

local button0 = toolbar:CreateButton(
	"Unique_ID_0",
	"Button_Tooltip",
	"rbxassetid://5806779841",
	"Button_Name"
)

local button1 = toolbar:CreateButton(
	"Unique_ID_1",
	"Button_Tooltip",
	"rbxassetid://5806779841",
	"Button_Name"
)


local widgetInfo = DockWidgetPluginGuiInfo.new(
	Enum.InitialDockState.Right,  --: This is the initial dockstate of the widget
	false,  --: Initial state, enabled or not
	false,  --: Can override previous state?
	500,    --: Default width
	500,    --: Default height
	100,    --: Minimum width
	100     --: Minimum height
)

--: This will be the info of the widget we're going to create

local widget0 = plugin:CreateDockWidgetPluginGui("widget0", widgetInfo)
widget0.Title = "Optional Name for the Widget"

local function onButton0Click()
	widget0.Enabled = true
end

local function onButton1Click()
	widget0.Enabled = false
end

button0.Click:Connect(onButton0Click)
button1.Click:Connect(onButton1Click)
Now you’re probably wondering how does our widget look like, well…
Widgets are like ScreenGuis, they don’t do much on its own but you can add GUI objects like Frames, ImageLabels or TextButtons to make them pretty. You can create GUI Objects by scripting them
or by adding them to the plugin folder and parenting them to the widget.
Now at least there’s something to read, but that white background still hurts my eyes, luckily we can use studio theme to turn it into a dark background (in-case you use dark mode… otherwise you’re a monster, just kiddin’)
widgetButton0.BackgroundColor3 = settings().Studio.Theme:GetColor(Enum.StudioStyleGuideColor.MainBackground)
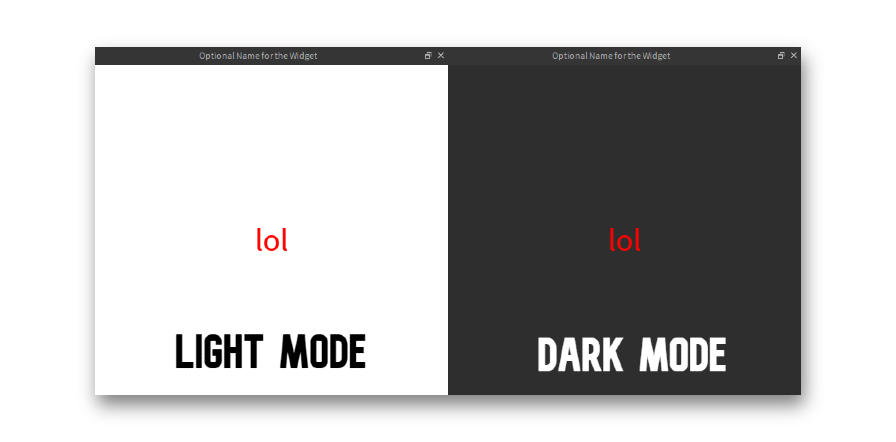
Pretty cool, right? Now we can use the TextButton we just inserted just as if it was in a ScreenGui. I scripted a quick function so the text randomly changes everytime you click it, just to show you.
local function onMouseButton1Click()
	widgetButton0.Text = tostring(math.random(1, 687))

    --: Display a random number as text everytime you click
end

widgetButton0.MouseButton1Click:Connect(onMouseButton1Click)
And this is just a little example of things you can do with Studio Widgets, I’m sure you can do better than me at UI design.
Now everytime you close studio the number will reset back to “lol”, but imagine that for some strange reason you want to save the last number you generated with the plugin after closing studio. Uh… how would you do it? If you don’t know how, let me answer your question, Plugin Settings.
3. Plugin Settings
Sometimes plugins will need to save values just like DataStores do, sometimes just little values like a name and sometimes big values like a whole script, just like InCommand does.
Instead of using DataStoreService, plugins have two built-in functions called :SetSetting and :GetSetting.
With :SetSetting you can store a value with a key (must be a string) and with :GetSetting you can retrieve the value by knowing the key name. Here’s a quick example.
--[[

This plugin script will run once everytime you open a studio place, meaning that
we can keep the count of times we ran this plugin.

In every session we increment thenumber of sessions by one to indicate that
a new session started.

--]]

local timesWeRanThis_Key = "key_name"
local timesWeRanThis = plugin:GetSetting(timesWeRanThis_Key)

if timesWeRanThis == nil then --: First time running the plugin
	plugin:SetSetting(timesWeRanThis_Key, 1)
else
	plugin:SetSetting(timesWeRanThis_Key, timesWeRanThis + 1)
end
Quick and easy, two functions, one key and one value, nothing hard.
-
ChangeHistoryService allows you to create waypoints to undo and redo actions.
-
Selection allows you to get the selected instances in edit mode and modify them.
-
CoreGui is normally used by guis created in-game by Roblox, but you can also use it to show gui objects or other objects like SphereHandleAdornments in-studio.
-
Instead of using the Mouse object you must use the special PluginMouse object by running the following function. It has an additional property that Mouse don’t.
plugin:GetMouse() -
Sounds can’t be played in-studio normally, you must use a function called PlayLocalSoud although this one has some limitations over Play.
-
There are some other plugin special functions that allow you to import FBX rigs and animations, create special menus and other, but it is up to you to investigate them at the plugin api reference.
3. Testing and Publishing the plugin
At this point you’re probably wondering how to publish and install your plugin. Before publishing there’s always an important step, testing, to test your plugin without publishing it just right click the plugin folder and search Save as Local Plugin…
Now you’ll be able to use your plugin, everything works fine? Ok, go ahead to the local plugin files and search for your plugin name and delete it. (You could keep it if you don’t want to publish the plugin)
Now we can publish the plugin, right click the same folder again and instead of pressing Save as Local Plugin… go one button down and press Publish as Plugin…

And we’re done, this part is up to you, it is not my job to decide your plugin’s name.
4. Designing a good plugin
You need problems, a problem to solve is a plugin to make. But you can’t just sit there and think about problems, you won’t get problems by doing so. My best bet is that you keep working on your projects until something pops up.
Once you find a problem you start making your plugin, but this is like a game, you don’t want bugs, neither errors and you want to provide a comfortable experience. A comfortable experience means a:
-
Simple experience, making a plugin that does what you need in a simple but functional way. Don’t make it so you have to press 20 buttons for just one task, less clicks, same result.
-
Understandable experience, making it so the developers can understand how to use a plugin by just looking at it. Try to add icons, keywords and use a clear language.
-
Nice-looking experience, making it comfortable for the eyes. Using high contrast colors, blurry images or extremely large/small text are not good ideas.
I recommend you taking a look at @Elttob’s plugins, I already included some of them in this tutorial because they’re a really good example. You could check out Atmos or Reclass, if you take a look at those plugins you can see that they do what they say they do, in a simple way, with a nice-looking and pretty intuitive interface.
5. Making the plugin look good
Before looking at the final section of this tutorial, I want to take a step back and talk about the nice-looking experience.
Even if you’re not working with a Studio Widget, you still have to put effort in making a good icon for the plugin and if your plugin uses buttons also make sure to give them cool icons that make developers feel comfortable.
The left side is my plugin button and the right side is DataStore Editor’s one. As you can see there’s clearly a difference in quality (omitting the fact that my icon shouldn’t be considered an icon). The same can be said about the plugin icon.

Remember that these icons are the face of your plugin, you want them to look cool. Here are some simple tips that anyone can follow to make their plugin icons better:
-
Keep in mind the resolutions, try to use the correct one always to avoid re-sizing. The recommended one for plugin icons is 512x512 and the recommended one for plugin buttons is 32x32
-
Keep them simple, these icons aren’t like the game thumbnails, you should keep them simple but original, if you’re making a plugin about sound use a sound horn as icon, if it is about saving values put a storage drawer or a folder as icon.
-
Try to use the .png format, it really improves the look of your icons.
-
Choose a reduced palette of colors, 2 or 3 and stick with them. Try to choose similar colors and do something cool with them!

6. Documentation & Open Sourcing
Going back to the idea of making our plugins understandable, w while ago I said that you should understand a plugin by just looking at it, but everybody loves to have that cool post or that cool video where you can learn everything about the plugin.You’re the creator of your own plugins and you’re the one that best knows how to use them, so it is your task to write a detailed and good documentation about your plugin. You must start by writing a good but short description that explains the main purpose of the plugin and make sure to link a devforum post, twitter post or a youtube video, but link some sort of documentation. Take a look at DataStore Editor.

This is an extra thing that not many plugins do, specially those plugins which cost robux, but if you’re planning to make free plugins consider taking a look at Open Sourcing them.
As you probably know, there’s no better way to understand a code other than reading it. If you’re a scripter and you know what you’re reading you won’t need any type of guide to understand what a code does. That’s why open sourcing could be an amazing opportunity to allow people understand your plugin.
Other benefits of open sourcing your plugin is the capability of improving your plugin, and by improving I mean a lot. If you’re only one dev making a plugin you won’t be able to notice all your plugin’s problems, but if you are 100 different developers looking at the same code, it will be so easy to spot possible problems or enhancements that could be done.
You also give others the ability to learn and improve by providing your own code, you could be someone’s teacher! Not really, but yeah your plugins could help someone who does not know about plugin scripting to learn easily.
Not everybody likes to open source, but for real, consider it. If you’re afraid of getting stolen, don’t worry, even if you don’t open source your code is still vulnerable. I myself have google extensions that allow me to download the source of all the free plugins found in the marketplace.
Don’t know how to Open Source a plugin? Take a look at GitHub, this place is a paradise for developers and it is so easy to use, they even have tutorials. Just go ahead, create a repository and talk about your plugin, share the code and make it public so everybody can help you by reporting issues.

This post started as a simple tutorial for beginners that didn’t knew about plugins but ended being a good article for those who want to improve their plugins. This was a long post to make so if you see some sort of mistake or error please say it, if you see something that could be improved feel free to also tell me.
Thanks for reading, flamenco_687.