Quickly Create Game User Interfaces Using Hundreds Of Predesigned UI Elements
Marketplace Link
Description
This plugin provides an extensive library of user interface (UI) assets that Roblox developers can use to quickly create user interfaces for their games.
-
Save time with ready-to-use UI assets
-
Professionally designed, beautiful, high-quality assets
-
Easily customizable using properties, or convenient attributes
-
Mix and match UI elements to build complete user interfaces
-
Responsive text that maintains a consistent size on any device or screen size
-
Optimized for Roblox with high image quality and fast loading
-
Intuitive and simple to use
-
Helpful built-in documentation
How To Use
-
Click on a UI element to add it to the center of your screen
-
Optionally, adjust the element attributes in Studio or in code as described below
-
Press Play to view
It is helpful if you understand UI concepts as described in the Roblox User Interface documentation.
Plugin Permissions
- Select Allow when prompted to allow the plugin to manage scripts.
- This can also be set in Plugins: Manage Plugins, and editing the script permissions for the plugin. Just click the Edit icon next to “Script Injection Allowed”.
- For more info: Plugin Script Modification Permissions.
User Interface Assets
The UI elements in the plugin are listed below.
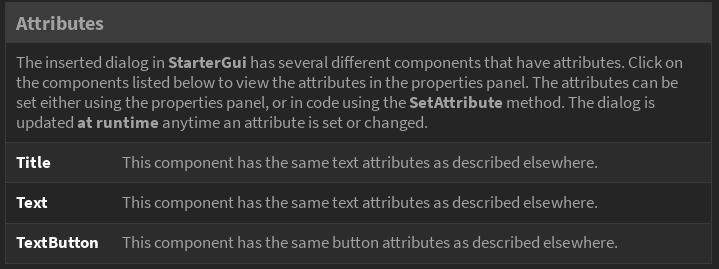
Attributes
Most elements have attributes that can be used to quickly customize the value or appearance of the element. Attributes can be edited using the attributes panel in Roblox Studio, or using the Roblox Attributes Methods in code. See the Attributes Tutorial below to learn more.Size
The size of each element can be adjusted to any dimension.Text
All the text is editable, and is also responsive so that it maintains a consistent size on any device or screen size.
Buttons
These are Roblox TextButtons and ImageButtons, with an enhanced graphical design.
Text Buttons 1
Text buttons in four different styles and ten different colors. The text is editable.
How To Use
- Add a button using the plugin.
- Select the inserted button within StarterGui.
- Edit the text using the element’s attributes as described on the More Info pages in the plugin.
- Press Play in Studio.
- Typically, developers will handle button clicks with a script using Roblox API button methods.
Four Button Styles
The buttons come in four different styles in ten colors. Or edit the values to create your own design and colors!

Any Button Size
Buttons can be resized to any dimension. The text is responsive so that it automatically resizes (at runtime) to the proper size for computers, tablets, and phones.

Text Buttons 2
Text buttons that point in a direction which is useful for drawing the user’s attention. The text is editable.
How To Use
- Add a button using the plugin.
- Select the inserted button within StarterGui.
- Edit the text using the element’s attributes as described on the More Info pages in the plugin.
- Press Play in Studio.
- Typically, developers will handle button clicks with a script using Roblox API button methods.

Text With Image Buttons
Buttons that have both text and an image, which is useful for price buttons. The text is editable. The icon image and color is editable so that any icon can be used on any button. These buttons are available in the four different button styles.
How To Use
- Add a button using the plugin.
- Select the inserted button within StarterGui.
- Edit the text using the element’s attributes as described on the More Info pages in the plugin.
- Edit the image using properties as described on the More Info pages in the plugin.
- Press Play in Studio.
- Typically, developers will handle button clicks with a script using Roblox API button methods.
Left Aligned

Right Aligned

Image Buttons
Image buttons of various designs and colors. The icon image and color is editable so that any icon can be used on any button.
How To Use
- Add a button using the plugin.
- Select the inserted button within StarterGui.
- Edit the image using properties as described on the More Info pages in the plugin.
- Press Play in Studio.
- Typically, developers will handle button clicks with a script using Roblox API button methods.

Form Elements
Checkbox, radio button, and switch images that can be used in forms you develop. The size and colors are editable. If you need ready-to-use, fully interactive form elements, please see the Forms UI Pack plugin.
How To Use
- Add an form element using the plugin.
- Select the inserted element within StarterGui.
- Press Play in Studio.
- Typically, developers will program form functionality using Roblox API methods.

Icons
Includes over 200 essential icons designed specifically for game development.
Icon Set 1
Icons with a default color of white that can be set to any color.
How To Use
- Add an icon using the plugin.
- Select the inserted icon within StarterGui.
- Edit the size or color using properties as described on the More Info pages in the plugin.
- Press Play in Studio.

Icon Set 2
Icons in full color.
How To Use
- Add an icon using the plugin.
- Select the inserted icon within StarterGui.
- Edit the size or color using properties as described on the More Info pages in the plugin.
- Press Play in Studio.

Bars
Bars of various types that can be used to show game or player progress.
Progress Bars
A progress bar that can be used to show the progress of any goal within the game. The bar completion and text are editable.
How To Use
- Add a bar using the plugin.
- Select the inserted bar within StarterGui.
- Edit the text or bar percent using the element’s attributes as described on the More Info pages in the plugin.
- Press Play in Studio.
- Typically, developers will set the bar values with a script using Roblox API attributes methods.

Info Bars
These bars can be used to show various game information such as progress, currency, XP, resources, etc. Both left aligned and right aligned versions are included. The icon, bar completion, and text are editable. The button is optional and can be hidden.
How To Use
- Add a bar using the plugin.
- Select the inserted bar within StarterGui.
- Edit the text or bar percent using the element’s attributes as described on the More Info pages in the plugin.
- Press Play in Studio.
- Typically, developers will set the text, bar values, and handle button clicks with a script using Roblox API methods.

Character Frames
An element that is typically used to show the character portrait, player level, and bars showing the current health, mana, or other stats. The image, text, and bars are all editable.
How To Use
- Add a character frame using the plugin.
- Select the inserted frame within StarterGui.
- Edit the text or bar percent using the element’s attributes as described on the More Info pages in the plugin.
- Edit the image using properties as described on the More Info pages in the plugin.
- Press Play in Studio.
- Typically, developers will set the text, image, and bar values with a script using Roblox API methods.

Tabs
Tabs that can be used to add navigation to your UI.
Tab Style 1
Tabs with designs in both horizontal and vertical orientations. The text is editable, as is the color of the text. An optional separator line can be shown between tabs.
How To Use
- Add a tab using the plugin.
- Select the inserted tab within StarterGui.
- Edit the text using properties as described on the More Info pages in the plugin.
- Press Play in Studio.
- Typically, developers will set the selected tab with a script using Roblox API attributes methods.

Tab Style 2
A traditional tab style. The text is editable, as is the color of the text, and the color of the tabs.
How To Use
- Add a tab using the plugin.
- Select the inserted tab within StarterGui.
- Edit the text using properties as described on the More Info pages in the plugin.
- Press Play in Studio.
- Typically, developers will set the selected tab with a script using Roblox API attributes methods.

Windows
Windows that can be used for any purpose within games.
Windows
A window that can be used to display any type of UI content. The title is editable.
How To Use
- Add a window using the plugin.
- Select the inserted window within StarterGui.
- Resize and position as needed.
- Edit the title using properties as described on the More Info pages in the plugin.
- Add your content to the body.
- Press Play in Studio.
- Typically, developers will handle the close button with a script using Roblox API button methods.

Dialogs
A dialog box that displays information and has buttons for user interaction. The title, text, and buttons are editable.
How To Use
- Add a dialog using the plugin.
- Select the inserted dialog within StarterGui.
- Resize and position as needed.
- Edit the text using the element’s attributes as described on the More Info pages in the plugin.
- Press Play in Studio.
- Typically, developers will handle button clicks and the close button with a script using Roblox API button methods.

Store
Windows that show coins, gems, and cash packs for sale. The text items, images, and buttons are editable.
How To Use
- Add a window using the plugin.
- Select the inserted window within StarterGui.
- Edit the text, product image, and button using the element’s attributes as described on the More Info pages in the plugin.
- Press Play in Studio.
- Typically, developers will handle button clicks with a script using Roblox API button methods.


Promos
Windows that show an example of items being promoted. The banner, text items, images, and buttons are editable.
How To Use
- Add a window using the plugin.
- Select the inserted window within StarterGui.
- Edit the text, product image, and button using the element’s attributes as described on the More Info pages in the plugin.
- Press Play in Studio.
- Typically, developers will handle button clicks with a script using Roblox API button methods.

Achievements
Windows that show an achievement such as the player leveling up or completing a task. The text and buttons are editable.
How To Use
- Add a window using the plugin.
- Select the inserted window within StarterGui.
- Edit the text and button using the element’s attributes as described on the More Info pages in the plugin.
- Press Play in Studio.
- Typically, developers will handle button clicks with a script using Roblox API button methods.
Quests
Elements that show the progress of a quest or achievement. The title, description, progress bar, and button are editable.
How To Use
- Add a quest using the plugin.
- Select the inserted quest within StarterGui.
- Edit the text, progress bar, and button using the element’s attributes as described on the More Info pages in the plugin.
- Press Play in Studio.
- Typically, developers will set the bar values and handle button clicks with a script using Roblox API methods.

Panels
Panels are intended to be used to display content within windows. You can adjust the colors to complement the color of your window background.
How To Use
- Add a panel using the plugin.
- Select the inserted panel within StarterGui.
- Resize and position as needed.
- Edit the size or color using properties as described on the More Info pages in the plugin.
- Press Play in Studio.

Graphics
Graphics that are useful for UI designs.
Accents
How To Use
- Add a graphic using the plugin.
- Select the inserted graphic within StarterGui.
- Resize and position as needed.
- Edit the size, color, or transparency using properties as described on the More Info pages in the plugin.
- Press Play in Studio.
Lighting
Lighting graphics are useful to showcase other graphics, such as products in your store. The color and transparency are editable.

Sparkles
Sparkles are useful as a background graphic to enhance the appearance. The color and transparency are editable.

Gradients
Gradients are often used behind other elements to add focus or interest. The color and transparency are editable.

Graphics
Graphics such as these are often used in the background to showcase other graphics. The color and transparency are editable.

Shadows
Shadows are often used behind or under other graphics to look like a shadow. The color and transparency are editable.

Metallic Gradients
These gradients are useful to make frames, icons, or other UI elements look metallic. The colors and transparency are editable.

Counters / Notification Badges
Elements that can be used as counters or notification badges. The text is editable.
How To Use
- Add a counter using the plugin.
- Select the inserted counter within StarterGui.
- Edit the text using the element’s attributes as described on the More Info pages in the plugin.
- Press Play in Studio.
- Typically, developers will set the text with a script using Roblox API attributes methods.

Stickers
Stickers can be used to showcase products with additional information. The text is editable.
How To Use
- Add a sticker using the plugin.
- Select the inserted sticker within StarterGui.
- Edit the text using the element’s attributes as described on the More Info pages in the plugin.
- Press Play in Studio.

Banners
Banners in a ribbon style that can really make the title stand out. The text is editable.
How To Use
- Add a banner using the plugin.
- Select the inserted banner within StarterGui.
- Edit the text using the element’s attributes as described on the More Info pages in the plugin.
- Press Play in Studio.

Currency
Images of coins, gems, and money in various amounts that can be used in product images, promotions, or currency displays.
How To Use
- Add a graphic using the plugin.
- Select the inserted graphic within StarterGui.
- Resize and position as needed.
- Press Play in Studio.

More
Additional user interface elements.
Grids
Grids can be used for such things as inventory or product listings. The color, grid size, and cell size are editable.
How To Use
- Add a grid using the plugin.
- Select the inserted grid within StarterGui.
- Resize and position as needed.
- Edit the grid or cell size using properties as described on the More Info pages in the plugin.
- Press Play in Studio.

Text
The text is editable, and is also responsive so that it maintains a consistent size on any device or screen size. This is important, for example, so that your text looks the same on a mobile device as it does on a computer.
How To Use
- Add the text using the plugin.
- Select the inserted text within StarterGui.
- Edit the text using the element’s attributes as described on the More Info pages in the plugin.
- Press Play in Studio.

Attributes Tutorial
This tutorial explains how to use the attributes of the UI elements. The help pages within the plugin have a description of all the attributes.
View Tutorial
Progress Bar Example
In this example, you will edit the values and appearance of a progress bar using attributes. The attributes of other elements are set in a similar way.
View The Attributes
- First, add a Progress Bar using the plugin.
- Click on the Progress Bar element within
StarterGui. - In the Properties panel, scroll down to the bottom until you see the Attributes section.
Attributes of the progress bar:

Set Attributes Using The Properties Panel
Use the Properties panel to set the attribute values, and then press Play to see the changes.
Set The Bar Percent
- Use the BarPercent attribute to change the bar length.
- In the Properties panel, in the Attributes section, enter a value of 20 in the BarPercent attribute.

- Press Play in Roblox Studio to play the game.
- The progress bar length is now displayed at the new value:
![]()
Set The Text Value
- Use the TextValue attribute to change the text displayed.
- In the Properties panel, in the Attributes section, enter a value of QUESTS 2/10 in the TextValue attribute.

- Press Play in Roblox Studio to play the game.
- The progress bar text is now displayed with the new text:
![]()
Set The Text Size
- Attributes can also be used to customize the appearance, such as the size of the text.
- In the Properties panel, in the Attributes section, enter a value of 0.9 in the TextSizeScale attribute.

- Press Play in Roblox Studio to play the game.
- The progress bar text is now displayed at the larger text size:
![]()
Set Attributes Dynmically At Runtime
Press Play, and then edit the attribute values to see the changes immediately. This is a great way to see what all the attributes do.
- Press Play in Roblox Studio to play the game.
- In the Explorer panel, open the Players section, and select the Progress Bar as shown in the screenshot below.
- In the Properties panel, in the Attributes section, edit any of the attributes to immediately see the changes.

Set Attributes With Code
- Add a LocalScript within
ScreenGuias shown below. - In the LocalScript, use the
SetAttributemethod to set the attribute values.

- Press Play in Roblox Studio to play the game and view the new values.
![]()
Roblox Documentation
License
The license is fair and easy to understand.
View License
End User License Agreement
The end user of this plugin must purchase this plugin from the Roblox Creator Marketplace in order to obtain the rights in this agreement. The end user meeting these requirements is granted rights to use or modify the UI assets provided by this plugin in Roblox experiences developed by the end user.
Copyright © 2023, MapleMarvel (MapleMarvel - Roblox). All Rights Reserved. This plugin and its assets are protected by copyright law and may not be distributed.
Latest Updates
View Updates
- Added three new button styles.
- Improved price buttons so the text and icon remain centered.
- Added achievement windows.
- Added store graphics.
- Added lighting and sparkles graphics.
- Added image with text buttons.
- Added additional icons.
- Added drop shadows.
- Added additional icons.
- Added stickers.
- Added additional icons.
- Added form elements.
- Added the Attributes Tutorial above.
- Added additional icons.
- Added new currency graphics showing stacks of money.
- Added settings panel that allows the scripts to be included or excluded.
ModuleScriptshave been consolidated intoStarterPlayerScripts.- Additional documentation has been added.
Contact Info
If you have any suggestions, requests, or need assistance, then please send me a direct message in these forums. I am happy to help!
Thanks For Your Support
If you like the plugin, then please leave a thumbs up or review on the plugin page in the Roblox Marketplace.
This makes a big difference and helps fund new development. Your support is very much appreciated!
Marketplace Link
Other Great Plugins
Store UI Pack
Quickly Add A Fully Functional Store To Your Game!
Forms UI Pack
Easily Add Interactive Form Elements To Your User Interface (UI)