This is a guest article from a community expert. We hope you enjoy it!
Introduction

Hi, I’m Peter “@MrChickenRocket” McNeill. I’ve been a game developer for over 25 years now, and I have spent a lot of time building games, engines and renderers.
I worked on Fruit Ninja, Jetpack Joyride, Candy Crush and a bunch of other mobile phone games and their engines, so mobile performance and optimisation is something I’ve gotten pretty good at.
With Roblox, I’ve released a handful of my own games and projects, and from time to time I consult with some very talented games teams to help make their games run better.
Usually this involves doing performance profiling, assessing their game world and assets, and making suggestions on how they can do the same things they’re already doing, but in more efficient ways.
What I did for this article is build a Roblox game using good building practices, and then optimized the heck out of it for great performance on all Roblox platforms, but especially mobile.
I’ll start off by showing you how to health check your own projects, explain some of the theory behind it, and then we’ll go on a tour of some real-world trickery and techniques you can use to make your own projects run faster.
The example game is called Cardboard Box Simulator, and it should look somewhat familiar to you if you’ve ever played BIG Games’ “pet simulator” series of games. (Shoutout to Preston for being a good sport about this!)
Cardboard Box Simulator is a demo of a simulator game, with the now-standard squiggly map layout, lots of pets, lots of coins, and plenty of new art and themes per area.
Project Highlights
- Rendering and CPU usage are optimized so that it runs on most phones at graphics quality 10 at 60 FPS (frames per second)
- Dense, interesting looking map, with lots of details and fairly high quality assets
- ShadowMap lighting technology, so there are nice shadows and lighting
- 30 pets per player, with advanced techniques to minimize their bandwidth and cpu usage
- Up to 200 coins per player, with local client physics for the rendering and a spatial grid for low cpu usage on the pickup logic
- Hides zones you can’t see
- Hides small details in the distance
- Fun effects like a fake underwater zone
- Built and scripted in a very straightforward way that should be easy to follow
- Uncopylocked and available here: Cardboard Box Simulator - Roblox

Pets, Coins, and Cardboard Boxes - all of the essential elements of any Roblox experience!

The average view is around 100 scene drawcalls and about 150k triangles.

The map is laid out in a squiggly snake pattern with five zones per row and big dividing green walls.
This article includes these main chapters:
- Budgets - How to budget your project
- Map Building Style - How to build in an optimal way for rendering
- Precalculated Visibility - Remove stuff behind walls
- Distance Culling - How to do basic distance culling
- Spatial Hashing - How to do fast coin collision checks
- Pets - How to do fast and efficient per-player pets
- Bonus Effects - Little flourishes from the project
And at the end are a few appendixes for things that didn’t quite fit in the main article.
Chapter 1 - How to budget your project
I’ve helped a lot of games with performance issues. Not just on Roblox, but with other engines, sometimes on some extremely old, low-end, low performance hardware.
Roblox is a cool engine and does a lot to help you out, via things like automatic quality scaling, but there are practical limits to what the underlying hardware can do. The biggest lesson I’ve learned is that if you don’t start out by budgeting ahead (and sticking to it!), the only way you can fix performance problems is by going back and redoing existing work.
So to avoid this, you need to budget before you start when you build games for Roblox.
Fortunately, in this article I’ll show you some good guiding numbers for your triangle count, drawcall count, memory usage, CPU usage, and bandwidth usage, and then show you how you can health-check them regularly to make sure your project is staying on target.
Then I’ll run you through some assorted advanced building and scripting techniques to stretch that budget even further!
And remember - once you have a budget, you can relax about building things in the ‘strictest most efficient way possible at all times’, because part of having a budget also means you can spend it how you want!
Note: Roblox does a lot to help your project if it’s running poorly, but it does come with a cost. On lower quality settings, you’ll get removed shadows, a reduced draw distance, simpler particles, simpler beams, and lose various shader effects such as water and glass. Best to avoid this!
Recommended Budgets
Here’s what I currently recommend* (mid 2024) for some good budgeting numbers, which will still let you have great looking scenes at 60 FPS on most (90%+) of phones and tablets out there, without causing the quality settings to automatically degrade off of “Quality 10.”
-
500,000 triangle budget for triangles “in scene”
-
500 drawcall budget “in scene”
-
Low as possible CPU usage on PC - old phones are nowhere as quick as PCs are
-
Aim for < 1.3GB client memory usage in order to support 2 GB phones (this article isn’t about memory usage, but this is good intel)
-
Aim for under 50KB/s network receive down on client - (40-60 moving assemblies - more on this later!)
-
Along with all advice in this article, these numbers are really just my opinion, and will be subject to change over time as Roblox makes improvements to the engine, and user hardware gets better!
How to Healthcheck Your Budget
Someone asked me recently (and somewhat incredulously) if the correct procedure to healthcheck your game really is to “just load it up, run around it randomly with some profiling tools open, and find the ‘hotspots’ and trouble areas?” To which I replied, yep, that’s absolutely what you should be doing, and doing it regularly. The Roblox profiling tooling is extremely robust, but if you don’t use it regularly and incrementally you’re leaving yourself open for rough surprises long term.
To start with, you should at least be using CTRL+F2 (CTRL+Shift+F2 in Studio) to open the scene rendering statistics, and checking your map’s rendering performance out.
I’ve found it has the most useful at-a-glance information out of all the debug screens.

Don’t let it intimidate you: most of the useful information here is Draw(Scene), CPU, GPU and the framerates.
Draw (scene)

Draw (scene) tells you how many drawcalls (95 in this case) and triangles (138634) your current view is rendering.
As mentioned, you should be regularly using this to look around your world and figure out where your hotspots are. In this map’s case, it never really gets above about 100 draws or about 150k triangles, which is well under our budget ![]()
Draw (Shadow)
Draw (shadow) is a more complex topic. It tells you how many drawcalls (36) and triangles (26999) are being drawn to the shadow atlas for shadowcasting each frame.
This only affects “ShadowMap” and “Future” lighting modes, which have shadows, and only on the higher quality settings. Currently, lower quality settings turn shadows off automatically.
Triangles and drawcalls for shadows don’t seem to impact performance nearly as much as scene geometry does, but you’ll still want to keep this number as low as possible:
- Consider using just ShadowMap if your game is mostly a big, sunny, outdoor map
- Be conservative of your use of extra shadow casting lights in Future
- Try turning Part.CastShadows off on details that don’t need it
- Try to keep the area of effect of lights small
- Try to keep shadow casting lights away from moving geometry (like swaying trees with a spotlight pointed at them)
The other 'Draw’s:
- Draw (total) is as-written, the sum total of all the other categories.
- Draw (UI) is your game’s UI - you should be concerned if this goes over about 150 drawcalls.
- Draw (depth) ‘goes away’ on lower quality settings, so I generally ignore it when doing health checks.
- Draw (3D Adorns) should just be included in your regular scene counts; this is for bounding boxes and other gizmos that are usually part of the editor.
CPU and GPU Usage

The MicroProfiler (CTRL+F6) is generally the best possible tool for getting an in-depth look at the CPU usage in your project, especially when you start writing complex and heavy scripts.
The MicroProfiler is also in my opinion one of the most advanced features of Roblox, and I could write a book on it and still not cover everything about it. For now though, there’s an appendix at the bottom of this article dedicated to the MicroProfiler, which you definitely should read later.
In the meantime, you can see the basic CPU and GPU ms usage next to each other on the CTRL+F2 rendering statistics display.
CPU Bound or GPU Bound? The CPU and GPU millisecond readout will instantly tell you one of the most important basic health facts of your project: Is your project CPU or GPU limited? You determine this by whichever of the two numbers is higher.
For example, if the CPU is taking 20 ms and your GPU takes 3 ms, your project is CPU limited, and likely has slow scripts or physics. If GPU usage is much higher than CPU usage, you are GPU limited, and are rendering too much stuff. ![]()
Note: This is going to be device specific, of course, and a friendly reminder to test on device fairly regularly.
Client Memory Usage


You can get a pretty good read of the total client memory usage via the CTRL+F7 readout, or via the console F9.
Sadly, client memory usage cannot be measured accurately inside of Roblox Studio, due to a bunch of overhead from the editor.
As with the MicroProfiler, there’s also a MUCH more elaborate memory profiler available via the console, too. I’ve added an appendix to deal with it at the end.
Bandwidth Usage

This is also part of the CTRL+F7 menu.
“Recv” is how much bandwidth the server is sending you each frame. This caps out at 50 KB/s before it turns red and throttles. Usually, this is used almost entirely by physics objects (and players) moving around, unless you’re also manually sending a lot of remote event data. At present, if this is over 40 KB/s, physics objects will start having their updates throttled, so you’ll want to stay well below that.
Because each moving physics object costs around 0.4-0.9 KB/s each, you can napkin math a rough safe budget of around 40-60 physics assemblies. Therefore, if you want to have hundreds of objects moving around your project, you’ll need to work around this limit.
An Example Budget
For Cardboard Box Simulator, I used the above budgeting numbers, and then further planned out the budget before I built anything, like so:
- ~300,000 triangles and 300 drawcalls as a fixed budget for the map
- ~200,000 triangles and 200 drawcalls as a flexible budget for the players, pets, coins and other effects
- Keep only 8 zones in view max at a time (I took advantage of the ‘snaking’ layout of the map to help with line of sight, more on this shortly!)
- Manually distance cull small objects
- Use ShadowMap lighting
- Use events for pets and coins, so they don’t cost any replication bandwidth (Recv)
- Use raycasts and math trickery for pets and coins so they use very little CPU
So with 8 map zones in view max, this gave me a rough per-zone budget of 40,000 triangles and 40 drawcalls.
Summary of Chapter 1
- Build a budget and stick with it.
- Regularly run around your map and health check its CPU and rendering performance.
- If your project is well under budget, you’ll have plenty of overhead for poor devices.
- Games that run well will usually stay on graphics mode 10, making it look fantastic and stay the way you designed it.
Chapter 2 - Map Building Style
The map is split into 30 or so zones that the player will progress through in a snakelike fashion. Each zone is only around 100x100 studs, and consists of some walls, the “pit” with all of the coins and treasures, and a bunch of walls and other decorations. Each zone is built on its own, and has its own budget for construction and theming.

It’s probably really obvious, but here’s how a “zone” is laid out.
Kitbashing
As mentioned, map zones are budgeted to be about 40k triangles and 40 drawcalls each. So there are a lot of ways we could fill up that 40k triangles and 40 drawcall budget, and you’re free to do whatever you want, so long as you’re within your budget.
For this project, I’ve chosen to use kitbashing.
Kitbashing is the process where you assemble, intersect and reuse lots of mesh parts instead of carefully building custom geometry and fussing about hidden face removal. Games such as Elden Ring, Fallout and Skyrim are famous for using this technique to speed up building. The legend goes that Halo 1, 2 and 3 all apparently only used a single rock mesh kitbashed all over the game world…
Kitbashing is just one technique for building maps efficiently. If you wanted to use lots more parts, unions, textures and decals, you’d be free to do so, just be aware they tend to chew your budget up faster than you might expect.

These rocks and panels get reused and ‘bashed’ together quite a lot!
Geometry Instancing and Drawcalls
Why kitbashing is efficient is due to drawcalls. As mentioned in chapter 1, you only have a limited budget of drawcalls per frame.
Drawcalls are complicated, and there is some more information on them in the appendix.
The simple explanation is if you reuse meshes with the same meshId and same material (but different color, rotation, scale, etc.) the engine is able to “batch” those and pack them all into one drawcall.
An example of it here is this tree that gets used all over the map. Even though the trees are made up of four meshes each - three top parts and a trunk - by using different colors, rotations and scales, it ends up only costing 2 drawcalls to draw all of them. If they were using different materials on each tree, or were unique mesh ids, they would be using a lot more drawcalls and our budget wouldn’t go very far.

2 drawcalls! Also, a fun note - if your mesh basically still looks the same when it’s in wireframe mode, it’s perhaps too many triangles. ![]()
Keeping Under Budget
As a general style choice, I’ve chosen to build the scenery out of cardboard, fabric, carpet, plastic or metal, and use fairly high resolution geometry and color to build the world. Vertex color is used a little bit on some models to make the colors look less flat (e.g. the bottoms of the cactus) This keeps the total number of materials low, which helps with batching.

One zone - with a budget of 40,000 triangles, 40 drawcalls. This particular zone ended up with 44,353 triangles and 23 drawcalls.
Combined with some distance culling on the grass and coins, this ends up being well under budget with a measly 23 drawcalls for the whole zone.

Same zone in wireframe.
Make your own reusable parts!
For rendering purposes, the Roblox parts like wedges, balls, blocks etc., are really just meshes internally and “batch” just like custom meshes do. However, because they’re a bit limited, with what you can make, you should feel encouraged to make your own general purpose reusable meshes for building with. Your own custom meshes will batch and render just as fast as the roblox ones.
Here’s some more examples of how I used that on this map:

I created a corner mesh for the rounded edges of the footpaths. They batch, and get used everywhere.

Fences use the same trick, a reusable mesh with bevels on four of the edges. These can be stretched like planks along that Z-axis. (Also, I checked with WoodReviewer. These logs get a grudging pass.)

This beveled cube with a bit of vertex color on it gets used all over the place, mostly for building walls. It’s only about 80 triangles.

This coin mesh obviously gets reused a lot. And they all batch, so you only pay for the total triangle count usage.
Advanced: Baking Part Models into Meshes
The townhouses were originally made of many many standard Roblox parts (blocks, wedges, etc.) This is okay, but it increases both the instance count and total drawcall count, as each mesh and material combo adds a drawcall. These houses went from 12 drawcalls and 100 instances each, down to 6 drawcalls and 6 mesh instances.
Because I wanted a lot of these houses, the solution here was to bake these models out into meshes. Roblox provides the tools to do this directly in Studio!
- Combine each of the different materials into their own unions - i.e union all of the brick parts together, all of the glass parts together, etc.
- Export each union to a mesh via the right-click context menu item Export Selection.
- Reimport each mesh part and recombine the house (remembering to anchor and set appropriate collision).

You can export sections of the Roblox map to .obj directly.

These houses were originally 100+ assorted parts and 12 drawcalls. It is now just 6 meshes, one for each material. Each house batches with each other too.
Extra Lights
In most zones, I’ve also chosen to add a few spotlights and point lights to “break up” the flat shading inside of shadowy areas or large flat surfaces. It’s a subtle effect, and because none of the added lights are shadow casting lights or move about, they don’t cost very much either.
If they DID cast shadows, and I was using Future, this would be a different story. ![]()
The interactions between Future lights, shadows, moving geometry, how much area the light covers and drawcalls are all connected, complicated, and probably worth an article all on its own.
The short recommendation is: be sparing with adding very large lights, in future be sparing with extra shadowcasting lights. Small lights tends to be fine, however.

A few spotlights and pointlights break up otherwise flat and boring shading.
Summary of Chapter 2
- When building, leverage “batching” as much as you can. This means reusing mesh and material combinations, and using scale, rotation, and color a lot.
- Create your own meshes for kitbashing with - a few simple primitives can go a long way.
- If appropriate, you can convert models made of lots of parts into a handful of meshes using Studio directly.
- Adding some extra lights can make the world look less flat.
Chapter 3: Precalculated Visibility
Hidden Geometry
Unfortunately, geometry behind walls still costs you rendering performance in Roblox.

Uh oh. That’s the whole map - another ~30 zones are being rendered behind here!

Wouldn’t it be better if we could get rid of all that hidden geometry?! If only there was a way!
With Roblox’s current tooling, enabling streaming can help hide distant geometry by creating a “streaming radius” around you, removing things that are far away, and for very large maps I highly recommend using it.
Inside of that streaming bubble, however (or if you’re not using streaming), there is even more you can do to reduce what gets drawn.
For this particular map, just having a streaming radius bubble wasn’t quite enough - the squiggly snake layout meant that zones right next to you, but on the other side of the wall, would still get drawn.
Roblox is working on occlusion culling technology to help with this, but until that’s ready, I used a technique called “Precalculated Visibility” to hide the zones you can’t see.
The details of the technique are actually very simple. The map is made out of zones, with a chonky great wall in between them.
If you’re standing in the red zone, you should only be able to see the orange zones. All of the yellow zones should be hidden behind walls and removed.

All of the yellow zones should be invisible if we’re in the red zone - we can’t see them!

From another angle - Standing in the middle gray city area, only 5 zones are actually visible. I left the camera max range on a high value so you can zoom out and “break” the visibility system so you can see what it’s doing!
Hiding Sections of the map via Part.Parent = nil
Sadly, we don’t have direct access to a visible property for models or folders. However, we can simulate this on the client by temporarily setting the parent property to nil. I use this trick to take entire zones and hide them if the player is not standing in them.
Note: Deliberately de-syncing the client and server view of instances is a very advanced topic with lots of edge cases. The main thing to know is you can modify most properties on the client and they’ll stay modified locally unless the server modifies them too.
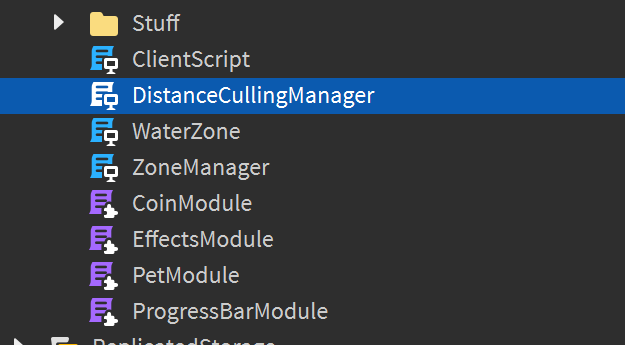
Zone Manager
For this project I’ve included a very simple system for managing the visibility of zones. It’s called ZoneManager, strangely enough.

Zones are models that are tagged with “Zone”.


All of the parts models and meshes that make up a zone go under one of these zone models. Inside of each zone model, there is a primary part that defines the rectangular 2D boundary of the zone. Then each zone simply has a list of other zones it can see if you were standing inside it.

Each zone usually only has 5 to 8 other zones it can see, stored in an attribute. These lists of other zones are hand written. (I regret nothing!)
At runtime, the final technique is simple:
- On startup, we add all the zones into a big list via the CollectionService.
- Every frame, we check what zone the player is in via their bounds part.
- If we have changed zone, we go and de-parent all of the zones we can’t see, and parent all the zones we can see.
Note: There is some CPU overhead in Roblox when you parent and deparent large number of instances all at once, or certain troublesome instances like unions. Keep this in mind for your own projects if you use this technique to try and limit how often you reparent things.
Summary of Chapter 3
- Hide zones you can’t see via parenting them to nil on the client.
Chapter 4 - Distance Culling
This map has a lot of very small details, such as pebbles, grass bushes, and even the coins in the coin pit. You’ll notice that you really can’t see them once they get more than a couple of zones away from the camera. Although Roblox can sometimes reduce the triangles of distant models, and streaming enabled can remove everything past a certain range, there is a much more reliable technique we can do ourselves called distance culling.

You can barely see objects this size once they get far away!

Look in the distance! That 50,000 triangles and 30 drawcalls worth of geometry going away. Hard to spot, right?
Using a similar technique to what we did in chapter 3, all of the small objects on the map are tagged as “Detail_Small” using the collection service.

Then the DistanceCullingManager collects all of the detail-objects at startup, and removes them if they’re more than 300 studs away from the camera.
It simply parents objects you can’t see to nil, and puts them back when you can.
One tricky detail here is that we don’t run the distant check every frame, because there are 250 or so detail-objects in the world, and that would be expensive to do. So instead, we wait until the camera has moved a small way from the last time we updated it before running the checks again. On top of that, we “smear” the update over several frames, by making sure we don’t do more than 50 checks per frame, using a coroutine.
Note: The distance culling is entirely compatible with the zone manager because you can still parent and de-parent details, even if its zone is also parented to nil…
Summary of Chapter 4
- Tag very small details with Detail_Small, and if they’re over 300 studs away they will vanish.
- Consider writing expensive loops in a way that can be updated over many frames.
Chapter 5 - Coin Motion and Collision Checks
Coins and pickups are a huge part of what makes simulator games feel juicy and fun to play. Unfortunately, if you just created coins on the server and used server collision checks, the coins would feel laggy and use up a lot of bandwidth, especially if they have spinning animations. If you just created coins locally, you can still run into cases where they use too much CPU or could be cheated by the player.
For this project, the coins are handled using a combination of techniques - the server sends events to create the coins on the client, and the client uses two optimizations to make the rendering and pickup logic fast.
Coin Spawning and Despawning
For coin spawning and despawning, this is done via remote events. Coins never exist as real server objects, and are never replicated. Each coin is created and cloned entirely locally on each client, and serial numbers are used to prevent cheating.
On the server:
- Coins are created on the server as records in a table.
- An event is then fired to the client who owns the coin, along with a unique serial number for that coin.
On the client:
- When the client gets a coin event, it goes into a queue - this makes the coin spawning occur over several frames which is a nice visual effect.
- When a coin leaves the spawn queue, the coin models are cloned locally on the client, and bounce around for a small amount of time using real physics.
- After that bounce time has passed, the coin is then anchored so it will no longer consume collision or physics processing time.
- Later, when a player collects a coin, the animation is done locally on the client, and a collection event is sent to the server with the coin’s serial number.
On the server:
- When the server gets a collection event saying a player has collected a coin (we check the serial number!), the server deletes that record and that coin is “finished”.
- (As a bonus action, if the server sees that a player has too many coins, it can also send an event to delete a coin)
Coin Tumbling and Spinning Motion
For this project, I wanted coins to bounce around a bit before they were able to be picked up. To achieve this, coins are actually a tiny physics cube that is allowed to tumble about after being launched. To make them look like the interesting, spinning coins your favorite plumber might collect, every frame a spinning model of the coin is rendered where the invisible physics part is.

Coins are two parts, a client-side unanchored physics object (the tiny cube) and an anchored rendering mesh for the coin.
This is done via updating all of the coin meshes via the BulkMoveTo API, documented here: WorldRoot | Documentation - Roblox Creator Hub You can see this code inside of the CoinModule on the client in the UpdateCoinsFast routine.
BulkMoveTo makes it possible to have many, many moving parts every frame on the client for relatively cheap CPU usage.
Fast Coin Collision Checks
Because there can be hundreds of coins in the world, we don’t want to be running distant check codes between the player and every coin every single frame. So what I’ve done is used an acceleration structure called a “Spatial Hash” to speed up collision checks. This works because Vector3 objects in Roblox can be used as keys in tables, which allows us to very quickly assign coins to a sparse grid of “cells.” Here, the cells are 10 studs large, and contain a dynamically updated list of all the coins that are within them. Then, instead of doing a distance check on 200 coins every frame, we only need to look at the contents of the 9 cells around the player to see what coins are nearby. We then run a distance check on those. As a bonus, once a coin has stopped moving, it no longer needs to update its cell every frame as it moves, making the per-frame collision check work incredibly cheap.

Each cell keeps a list of what coins are in it. Coins update their cell as they move around.

We only distance check the coins in the nearby cells, instead of all 200.

All of the coin client logic can be found here!
Note: You could probably use “GetPartBoundsInRadius” to build a fairly performant early “broadphase” collision check for coins instead of this. However, in my own testing the spatial grid ended up being faster, especially for larger pickup radiuses.
Summary of Chapter 5
- Use events to spawn and despawn coins.
- Use physics to make coins bounce.
- Use bulkMoveTo to render cool spinny coins cheaply on the client.
- Use a spatial grid to make the pickup logic very fast.
Chapter 6 - Pets and Physics
Generally, pets in Roblox games are variations on floating boxes that scoot along the landscape following players.
Because this project aims for 30 pets per player - meaning a whopping 360 visible pets in a 12 player server - it really needs an efficient way to render, control and network replicate a lot of pets as cheaply as possible.
What I went with was similar to how the coins are implemented in chapter 5, where pets only exist on the server as data in a table, and remote events control adding, removing, and controlling pets.
Remote events are used to assign the current task to pets, so that they don’t take any bandwidth for movement replication at all.
For rendering them on the client, we use raycasts and math to figure out their position, and then :PivotTo their model into place every frame.
Note: A much simpler way to do pets is to use a full humanoid rig for the collision. That is quite a heavy thing to do in terms of performance (both bandwidth and cpu) - hence this cheaper approximation.

Look ma’, no bandwidth!
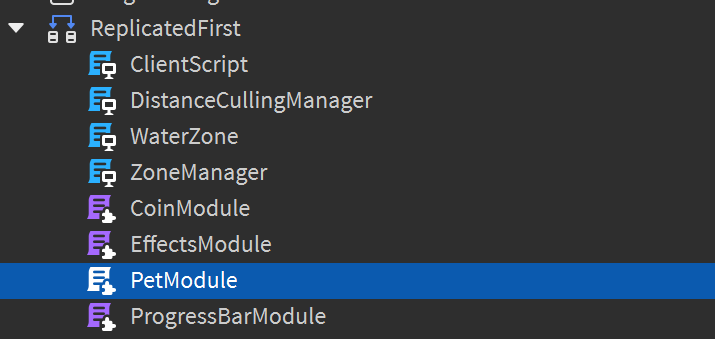
All of the client pet logic can be found in PetModule and PetModuleServer.
Pet Spawning and Despawning
Pets are controlled entirely by remote events. Every player gets told about every other player’s pets creation and deletion event, and what activity those pets are currently doing - which is either following their owner, or digging. The creation lifecycle looks something like this:
On the server:
- The server sees a player connect, and creates all of their pet records.
- The server makes sure all connected players get told about this pets creation via remote event.
- If a player leaves, a pet destroy message is sent to all remaining players.
On the client:
- When clients get a pet created event, they create the pet record locally, and clone in the pet model.
- When clients get a pet destroyed event, they destroy it and remove the record.
Pet Control
Pets are controlled via remote events. They really can only be doing one of two things: Following a “slot” on their owners character model (using attachments!) or digging at a mining spot.
On the client:
- If the player clicks something, the targeting event is sent to the server.
On the server:
- Player targeting events are processed to see if they make sense, and if so, it sends out events to all players telling those pets to change target to the mineable object (coin pile)
- If a mineable object finishes mining, it sends out events telling those pets to start following their player again.
Pet Movement
Pet movement is not replicated with this system! Usually, moving parts in Roblox absolutely chews up bandwidth, which is not acceptable if you have hundreds of pets moving around. Instead, pets move around based on their current target, and their frame to frame movement is calculated entirely on each client.
Each client frame:
- The client calculates a new pet position for each pet based on its current target, including all of the other players pets too.
- Each pet raycasts a new height for the pet off the ground.
- Each pet calculates a silly walk animation offset to its current position.
- Each pet finally gets moved into its new position with :PivotTo().
Optimizations
On top of being an entirely event-based system, which makes it cost almost no bandwidth, there are several other key optimizations that speed up the pet system:
- Pets avoid raycasting if they have not moved since the last frame.
- Pets avoid calling :PivotTo() if they do not have a new CFrame since the last frame.
- The pet power level surfaceGui on their back has a maximum distance value set, so it goes away quickly.
Summary of Chapter 6
- Pets are “faked” by using remote events to control their overall behavior, and are not replicated parts - this makes them cost practically no bandwidth.
- Pets use raycasting and math to move around on the client - this makes them cost very little CPU.
- Pets use some early-outs to avoid calling heavy functions such as :PivotTo() or raycasts - this helps them run even faster.
Chapter 7 - Bonus Effects
Around the map you might have spotted one or two little extra touches. I didn’t need to do this for the demo, but I chose to anyway. ![]() They use CollectionService to turn parts that don’t normally do anything into neat little visual spot-effects.
They use CollectionService to turn parts that don’t normally do anything into neat little visual spot-effects.
Here’s a quick summary of some of them.
Underwater Fog
The fog is really simple - if the camera is inside a part tagged with “Water”, fog is turned on; otherwise, it’s turned off.
Foggy underwater and scrolling water surface
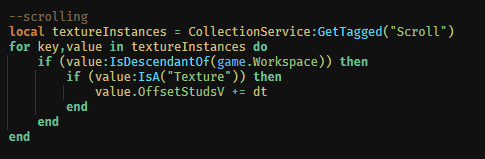
Scrolling Water
The surface of the water area scrolls using a texture instance. Once again, CollectionService does all the work here.
Wobbly Waterspouts
This one’s the same sort of trick - just some sin() and cos() action on the size of a waterspout part, using CollectionService.

Laminar flow!
Summary of Chapter 7
- Use CollectionService to provide spot effects on your map.
- This chapter did not need a summary. It is about four lines long.

Final Thoughts
Thanks for coming on a tour of Cardboard Box Simulator!
Hopefully there was something in here that got you thinking about how to get high performance out of your own Roblox builds in the future.
This is a partner article to my 2024 RDC talk on optimization and performance (find it on youtube!) where I spend more time covering how drawcalls and batching works, as well as spending some time on other project health issues like memory, instance counts, and startup times.
If there are two main takeaways though:
- Plan ahead - You’ll have a much nicer time making high performance roblox projects if you budget your build out before you start - especially triangle counts and drawcalls.
- Test regularly - Check the health of your project regularly. All of the profiling tools work in the live game, too, so you can check it out under real circumstances quite easily, and you should.
Link to the Project Cardboard Box Simulator - Roblox
Special Thanks
- Preston and Big Games for being good sports about the completely accidental resemblance of this project to the Pet Sim franchise (I did ask before I started!)
- The DevFivum crew for their ever present advice, support and proofing
- My ever patient wifu, while I spent my evenings getting this all typed out
- Robert Ly and Andrew Etter from Roblox for putting me up to this, getting it all formatted, and keeping me supported
- And all of Roblox for making such a bangin’ engine


